Archive for the ‘And Everything Else’ Category

Narwhals, Narwhals, Swimming in the Ocean

DSCF4043

A few years ago, everyone was playing The Narwhal Song.  It was one of those songs that would just get stuck in your head.

Listen if you dare.

You’re welcome!

One of my daughter’s college friends delighted in torturing me with it any chance he got. So when I found this ridiculously sequined embellishment in the clearance aisle, I knew it would make the perfect birthday card for him.  I changed the wording of the song for the inside of the card, “Singing Happy Birthday because you are so awesome!”

Then I happened to run across Shark Bites fruit snacks in the grocery and I knew I had to take it a step further.

April 20, 2011

April 20, 2011 (2)

I scanned the front and back of the box and then got busy with photo editing software.

Back-MASKED

Front-MASKED

I masked over the “Shark” portion of the title.

Narwhal  Word Only

Then I used Print Shop Pro to create the new “Narwhal” title matching it as best I could to the existing curve and remaining logo.

DSCF4044

DSCF4045bo

The final step was to print out the new pictures and attach them to the front and back of the original box.  It wasn’t perfect, but it was close enough.  Both my card and gift were a definite hit and brought lot of laughs.

Cat Toys

20160627_193411

Strangely enough, this idea came from a dog training classes for our latest rescue baby.  We had been working on training the dogs to ignore distractions and used some similar cat toys.  They were so much fun, I just knew my feline granddaughter would love them.

I already had everything I needed to make some at home – feathers, dowel rods, and tape.  I chose to use electrical tape as it was sturdy and flexible.  I wrapped the tape around the ends of the dowel rods adding feathers as I went and finishing with an additional length of tape.

As expected, they were a hit!  Little Miss Meggie’s delight was difficult to capture on camera, so my daughter posed her with her new toy.

20160711_073835

She looks like she thinking, “Ok Momma, enough of this photo nonsense.  Let’s play some more!”

Failure and Success

We all love Pinterest. But sometimes things don’t work out.

20160630_072619

Such was what happened when I attempted to dry fresh strawberries in the oven. It was taking forever. The recipe I found said three hours. After six, I still had a mushy mess. My solution? Slowly increase the heat. Mistake! Big, big mistake! As you can see, I was left with a nasty charred mess. I soaked it for two days. That didn’t help. I was not looking forward to the time and effort it would take to clean my scorched cookie sheet. For a moment I considered just throwing it away and buying a new one. What to do? Go back to Pinterest of course!

20160701_211037

One of the home remedies called for a mixture of baking soda and peroxide, both of which I had on hand. I mixed up a paste and spread it on the cookie sheet and left it to work its magic.

While it wasn’t completely scrub free, with some light scouring every bit of the scorching came off relatively easily!

20160701_211055

There were some differences in coloring to my aluminum pan, but it was clean.

I’ve since found another recipe for dried strawberries using parchment paper, different methods, and a longer cooking time. Now that I’m armed with my new cleaner, I might just have to try again!

Painting With A Twist

13307471_10154526546858455_3989081385851529410_n

My daughter was in town and what better way to spend a Girls’ Night Out than painting?  When were were messaging online trying to find somewhere to go, it was the same painting that we both simultaneously messaged to each other,  “Ooooh, I like that one!”  And that was how we discovered Painting With A Twist.

With a number of locations, some within the same geographical area, we had lots of paintings to choose from.  This was her second class and my third.  We both agreed that our instructor was so enthusiastic and created such fun environment.  Class participants are allowed to bring in their own wine and snacks.  Aprons with whimsical artwork and fun party hats are provided.

Incidently, I was hard at work and concentrating intensely when my daughter insisted on snapping this selfie of the two of us.  She teased me, “Oh you’ve got that I’m-focused-why-are-you-interrupting-me face!”

2016-06-21_11-22-48

The first step was to create the blue background.

2016-06-21_11-23-04

Then we blended in some black to create depth.

2016-06-21_11-22-30

Cropped

Once the background was completed, we added grass.  Here we both are again, hard at work.

2016-06-21_11-22-15

The fuzzy flowers and firefly lights were created with a new technique we learned using our fingers to soften the brush strokes.

13323579_1066827196722738_4110724791437183981_o

My friend, Betsy, and her daughter, Alyssa, joined us for the evening and we created some wonderful masterpieces.  It was so much fun.  And I do have to say, we looked stunning in our colorful fedoras.

2016-06-21_11-21-47

Here are our finished paintings.  My husband couldn’t tell who’s was who’s.  Just so you know, my daughters is the one at the top, and mine is the one at the bottom.

Printer Tray Project

20160624_001150

With my Great Wall of Ancestors completed, my attention turned to the space above my newly refinished desk.  A few weeks earlier, I had rediscovered my 7 Gypsies Printers Tray.

7gypsiesprintertray

A Christmas gift from my husband a few years earlier, I had put it aside until I could decide exactly what I wanted to do with it.  Then it got buried in my craft room and I had completely forgotten about it.  Upon rediscovering it, I knew it would be perfect above my desk.

The next challenge was figuring out how to decorate it.  Selecting the photos was easy as I had some recent ones of our family in mind.  With Microsoft Photo Gallery, I changed the color photos to sepia tones.  In keeping with the family history theme of the room, I sorted through the various quotes I had collected and searched the internet for more.  I used Microsoft Photo Gallery again, to convert the graphics I had downloaded to either sepia or aqua tones to coordinate with the color scheme of the room.  The addition of a few vintage looking graphics finished off the twelve different images I needed.  I found some coordinating scrapbook papers and used mats and foam tape to create some dimension.  Once everything was in place, I sorted through all the mixed media items I had collected, arranging and rearranging the three dimensional pieces to accent my images.  A bit of hot glue, and my project was finished.

20160624_001228

Here it is, at last hung in place.   I am so happy with how it turned out!

The Great Wall of Ancestors

Great Wall of Ancestors

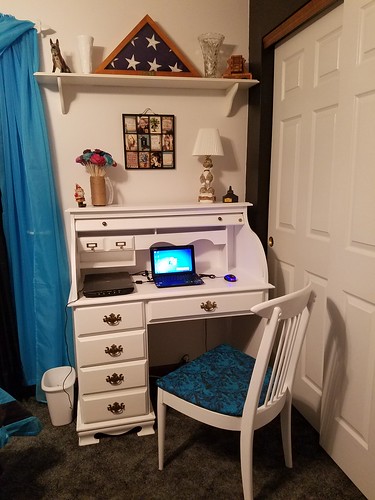
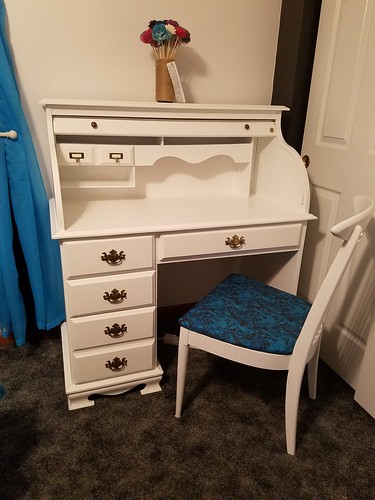
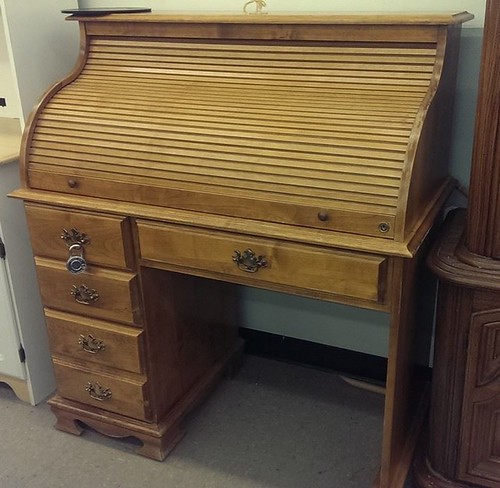
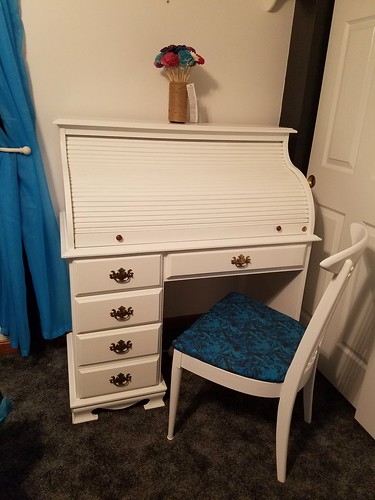
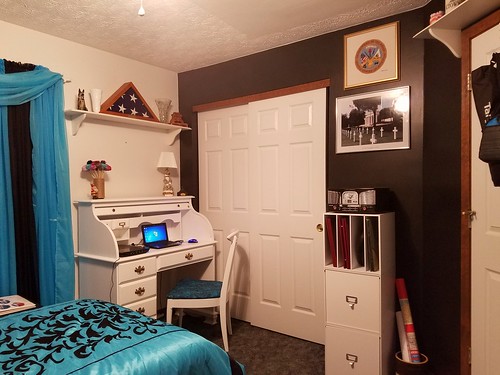
With my desk finished and in place, it was time to move on to the next project for my Genealogy Room.

20160617_072056

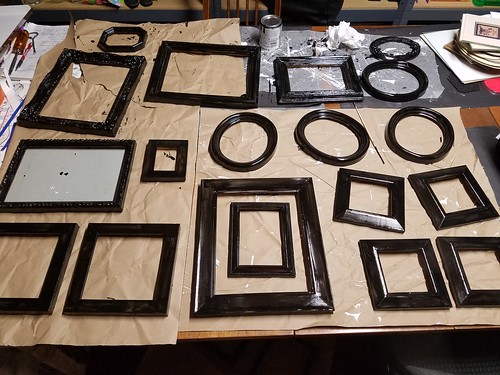
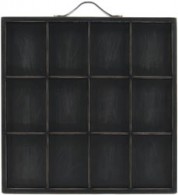
I spent over a year collecting various sizes and shapes of picture frames from thrift shops and garage sales.  My original plan was to paint all the frames black, but when I looked at photos of other photo wall projects online, I really liked the mix of gold and silver frames in with the black.

20160619_203050

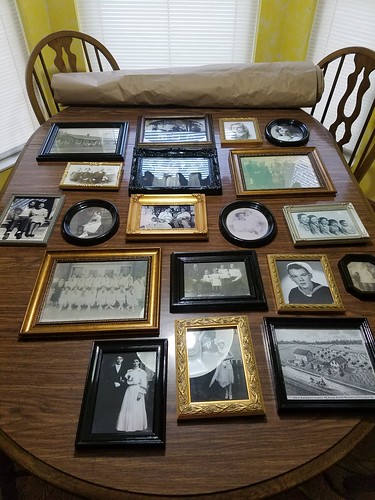
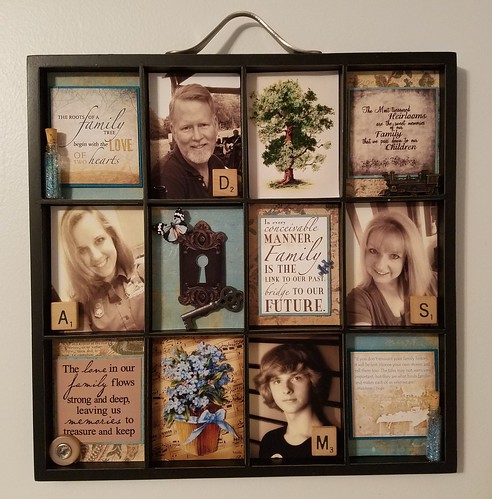
I am blessed with so many vintage photos of family members.  To keep me organized, I created a spreadsheet with frame sizes and lists of photos I wanted to use for my project and carefully matched them up.  Even though my photos were black and white, I printed them in color on matte photo paper.  This preserved the sepia tones and other richness in the photos.

20160621_192311

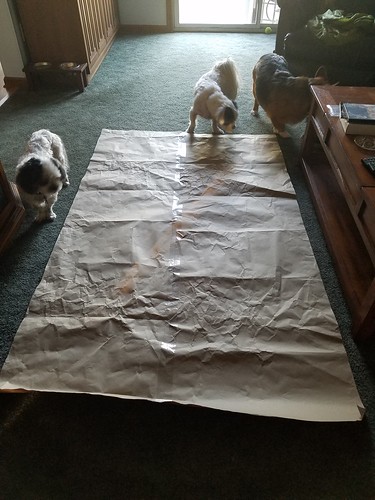
Once they were all framed, I measured the wall and cut a large piece of paper to size so that I could take my time and lay them all out in an arrangement I liked.  Even with all the “help” of my curious furry children, it took me hours to finalize my arrangement.

20160621_212900_001

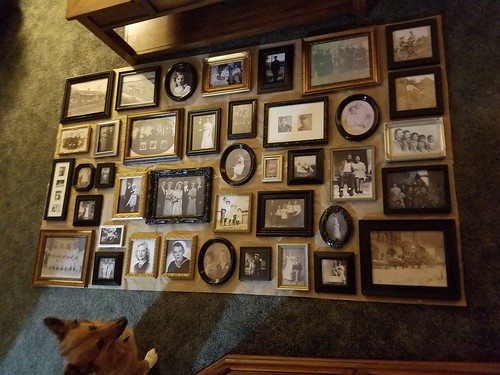
Then I carefully traced around the outside of each frame to preserve the placement and create a template for hanging the photos.  As I had some frames that were the same size, I also wrote the description of the photo within the traced border so I would remember exactly which photo went where.

20160622_172142

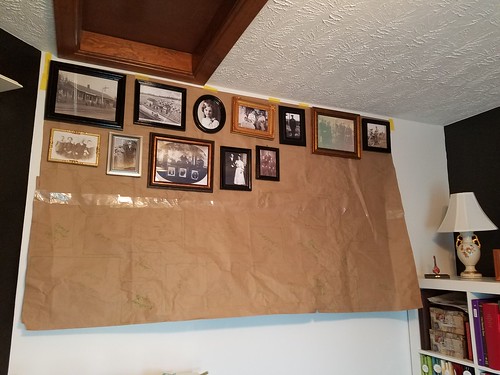
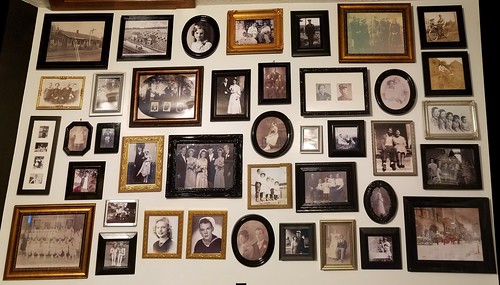
With the help of my husband, we used painter’s tape to secure the template and I started to work.  I matched up each frame with its corresponding tracing.  To obtain the perfect positioning for the nails, I used a tiny bit of toothpaste dabbed onto the picture hanger and then pressed the frame against the template.  After I had all the frames hung, I removed a few at a time and carefully pulled my template away from the nails, rehanging the photos as I went.

2016-06-27_11-06-16

As I stood admiring my work, my son, who will be going off to college in the fall came in and remarked, “That’s creepy. Please don’t change my room because I don’t want to sleep in here when I come home to visit.”

To which I replied, “Dude, these people on that wall are why you are here!”

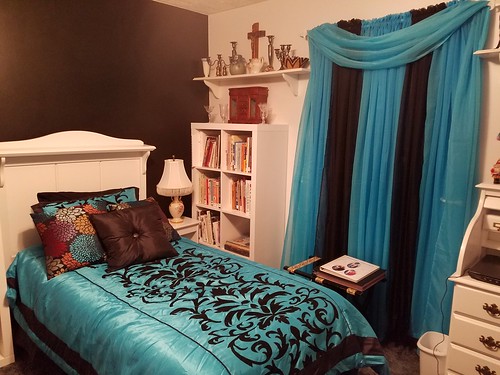
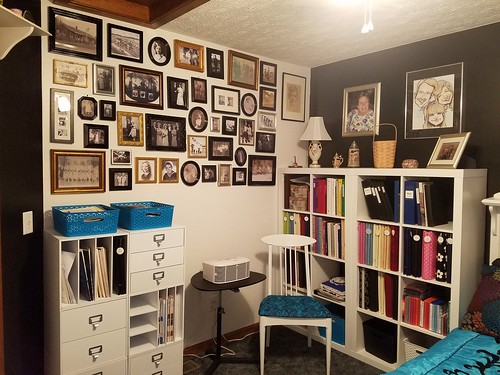
While he may have his reservations, I find the photos give my room such a warm cozy feel and I find it quite comforting.  Each and every one of them are there with me.  Not only can I call this The Great Wall of Ancestors, I am proud to say it is also The Wall of Great Ancestors.

Refinished Desk

2016-06-21_11-17-29

After four years of college and nearly two years of internships, when my daughter finally moved to a place of her very own, she left me with a room of my very own.  Little by little over the past year, I have turned it into my Genealogy Library and Museum.  It still doubles as a guest room, but it has become my own little retreat.

After filling it with shelves and modular storage, there was a small space left for a desk.  I had been shopping locally and online for one, but hadn’t yet found one I was ready to select.

Before 032115

And then my husband found this diamond in the rough while we were shopping in one of our local thrift shops.  It lived in my garage for months, waiting for the right weather to allow for its make over.  First it was too hot, then it was too cold.  When spring rolled around again, I knew I really wanted to get at it.

enamel_can

During a trip to Lowes when my daughter was moving, she and I discovered this innovative paint on an end-cap display.  The most attractive thing about it was that it said it did not require sanding or priming.  That would mean for a speedy project right?

My birthday is in the spring and when my husband asked me what I wanted, I joked, “I want my desk finished.”  I really had intended to complete this project myself, but he took my words and ran with them.  Working second shift and getting home in the wee hours of the morning, this was just the right thing for him to quietly work on and not disturb those of us who were sound asleep.

It took nearly two months, and while he didn’t have it done by my birthday, it was in place in my room before the end of my birthday month.  I didn’t mind.  He was so meticulous and he took extra efforts to make sure every inch of the makeover was perfect.  And secretly I was relieved that I didn’t have to do it.

As far as this miracle paint went, it was not quite as fantastic as we thought it was going to be.  My husband had remarked that while he liked the paint and would use it again, he thought sanding and primer would have aided an easier application and finish.  It took two coats and in some areas three.  But it came out beautifully and I am beyond thrilled with it.  I now have a place where I can set up a laptop and my scanner as well as make progress with my research and filing.

2016-06-21_11-17-16

And just so you can see my fantastic oasis, here are some photos of the entire room.

2016-06-27_11-07-30

2016-06-27_11-06-16

2016-06-27_11-06-38

I just love it!

My Winey Kitchen

I love Mary Engelbreit.  That being said, for a number of years, I have enjoyed her bright colorful wall paper border in my kitchen.  But, as my kitchen has transitioned to more of a wine theme, it just wasn’t working for me anymore.

IMAG2472

Not yet wanting to repaint the walls, I searched for another border that might work.  Part of my soffit is narrower than what is pictured above so that presented a challenge.  If I found a border I liked in the right colors, I kept running into the situation where it had been discontinued and I could not purchase the amount I needed.  Or that it was too wide to fit on the narrower parts of the soffit.

So I brainstormed.  Finally it came to me.  Why not do something creative with wine quotes?  Together my husband and I selected two of our favorites.  And then I went shopping.

IMAG2506

As luck would have it, wooden letters were on sale that day.  I spent hours determining what letters I needed to create a very random look.  Just when I was finished, I found even more letters in the clearance aisle.  That meant additional time and revamping my design.  But eventually I made it to the checkout before the store closed.

IMAG2507

At home I was able to lay them all out to make sure I hadn’t missed any letters.

IMG_0477

The next step was painting them all black.  I used Rust-oleum High Perfomance Enamel in gloss black.  Since I did not prime them, it took two coats, but I suspect it would have taken two coats regardless.

Once they were dry, I rolled out some newsprint paper measured the same distance as the soffits where they were to be placed and created a template for spacing the letters.

IMG_0679 (2)

IMG_0675 (2)

Here’s the finished project!  I am so pleased with how it turned out.  These are the two main soffits in the room.  For now those narrow ones remain as a blank canvas.  I thought they would look really empty, but they do not.  I am planning something a little different for those areas so they don’t take away from those main quotes.  I am hoping to find some rustic looking wooden signs with the names of some of our favorite wines on them.  But if not, I’ll just have to make them!

Photo Magnets

Who with a crafty idea can resist a bargain?  I surely couldn’t when I found several boxes of canning jar leads in the clearance basket at the grocery store.

I just knew they would make fantastic personalized magnets using photos of some of my favorite people.

PC110769

I printed out photos and cut them into circles that would fit inside the beveled edge of the lids.  Then I glued them onto the tops of the lids.

PC110770

On the back, I applied adhesive flat magnets, cut to size.

Voila!  Refrigerator artwork!

PC110772

I bought up all the boxes they had on clearance as these magnets make really fun inexpensive gifts.  They could even be decorated with artwork to keep with the theme of your kitchen decor.

My next plan is to use them to create a holiday family history wreath featuring vintage family photos.  I know it’s only June, but knowing me, I better get started!


What Happens When We Don’t Have Internet

2016-05-11_09-30-07

A very nearby lightning strike took out our modem yesterday.  I was at work and my son had taken a break from gaming when it happened.  When he returned to his computer, he no longer had an internet connection.

He called me at work and I directed him to the information he needed to call our ISP.  They verified there was no outage and then walked him through some preliminary trouble-shooting without any success in restoring the connection.  The final verdict?  The modem was showing as offline.

When I arrived home, I found him in the living room watching a DVD and crafting!  He had received these adorable Mario & Luigi Paper Jam paper craft models at a recent anime convention he attended.

A quick assessment of the modem showed that only the power light would come on and that I was unable to connect to it through our network.  My son confirmed that while he was away from his computer there had been some tremendous thunder and he had heard a crack that felt like it was very close to our house.  Later in the evening we learned that our neighbor’s house had suffered considerably more damage than just a blown modem.  So yes indeed, lightning had struck very nearby.

My son had assembled the first model and actually took the second one with him as he accompanied me on the trip to Office Depot to replace the modem.  My daughter’s boyfriend directed us to the model we needed and I had it installed and activated in no time.  Our internet was back up!

I shared this joyous news with my gamer son, who continued to assemble the rest of his models.  I guess once the craft bug bites, it’s hard to fight it.

These little guys are adorable!  I took a picture of them so I could blog about them.  I soon found out that my son had done the same thing and posted his picture to Facebook.  The caption?  “What happens when I don’t have internet.”

It was fun to have him back crafting.  Even for just a little bit.

You can assemble your own Mario & Luigi Paper Jam models too!  Download the full color PDF document at http://marioandluigipaperjam.nintendo.com/downloads/.  There is also a download for a Mario paper airplane and a Mario throwing star at this same address.